Foolproof White Bread Recipe for Bread Machine
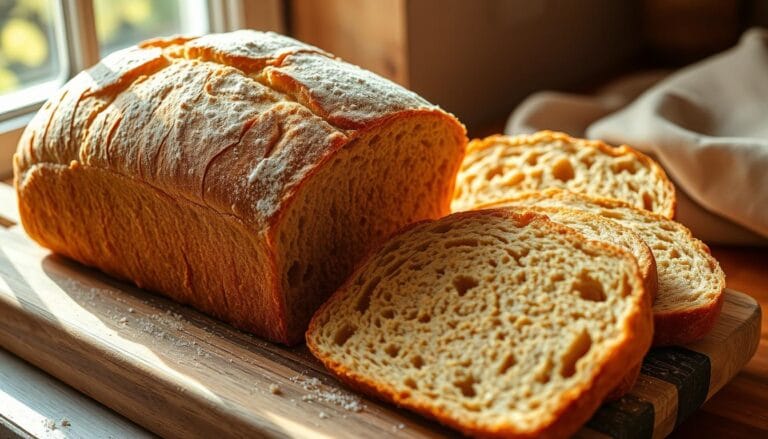
Every time I pull a perfectly golden loaf from my bread machine, I’m taken back to my grandmother’s kitchen. The warm, comforting aroma of freshly baked white bread fills the air. It brings memories of lazy weekend mornings and family gatherings. Your bread machine can make bakery-quality white bread right in your own home.
This white bread recipe for bread machine makes baking easy and stress-free. Whether you’re new to baking or have lots of experience, this recipe is simple and reliable. With just a few ingredients and a little effort, you can make a delicious homemade loaf that’s as good as any store-bought bread.
Table of Contents
Key Takeaways
- Guaranteed success with a foolproof bread machine white bread recipe
- Simple ingredients for consistent, delicious results
- Perfect for bakers of all skill levels
- Quick preparation with minimal hands-on time
- Versatile recipe works with most bread machine models
Essential Ingredients for Perfect Bread Machine White Bread
Making easy white bread starts with the right ingredients. Your homemade bread needs quality parts to taste great. Let’s look at the key ingredients for a great bread machine loaf.

Key Dry Ingredients Breakdown
The base of any good white bread recipe is dry ingredients. Here’s what you’ll need:
- Bread Flour: Gives the bread structure and protein
- White Sugar: Feeds yeast and adds sweetness
- Salt: Boosts flavor and controls yeast
Essential Wet Ingredients
Wet ingredients add moisture and bind the bread. The main ones are:
- Warm Water: Activates yeast and develops gluten
- Vegetable Oil: Makes the bread soft and prevents it from being too dense
Selecting the Right Yeast
Yeast makes bread rise. For your machine, pick the right type:
| Yeast Type | Best For | Preparation |
|---|---|---|
| Active Dry Yeast | Traditional bread machines | Needs proofing in warm water |
| Instant Yeast | Quick bread preparation | Can be added directly to dry ingredients |
Success in making white bread depends on accurate measurements and fresh ingredients. Measure well and keep yeast cool and dry to keep it active.
Why This White Bread Recipe for Bread Machine Never Fails
Making the best white bread for a bread machine is more than just a recipe. It’s about knowing the science behind making perfect bread. This foolproof white bread recipe is special because it tackles common baking problems head-on.
The secret to always getting great results is in a few key areas:
- Precise ingredient measurements that create optimal dough structure
- Balanced hydration levels that ensure soft, tender bread
- Yeast activation techniques that guarantee perfect rising
Professional bakers love this recipe for its dependability. The controlled environment of a bread machine helps avoid the usual baking mistakes. Your bread machine keeps the temperature and kneading consistent, leading to reliable results.
This recipe works well with all bread machine models. Whether you’re new to baking or have lots of experience, you’ll always get amazing white bread.
The foolproof white bread method takes the guesswork out of baking. By sticking to the simple steps, you’ll get a loaf with the perfect texture, a golden crust, and amazing flavor. It’s sure to impress anyone who loves bread.
Step-by-Step Preparation Guide
Making the perfect bread machine white bread needs focus and the right steps. Success comes from following a detailed guide for tasty results every time.
Creating bread machine white bread is an art. It mixes simple ingredients with careful techniques. Knowing each step and doing it well is key.
Proper Ingredient Order
Adding ingredients in the right order is vital for your bread machine. Here’s how to do it right:
- Start with liquid ingredients
- Then add dry ingredients on top
- Put yeast last, away from liquids
Machine Settings and Programming
Choosing the right settings is important for bread machine white bread. Most machines have a white bread setting:
- Use the “White Bread” or “Basic” program
- Choose your loaf size
- Set your crust color (light, medium, or dark)
Monitoring the Baking Process
Even though your machine does most of the work, watching it can help:
- Check the dough’s consistency during mixing
- Make sure it forms a smooth ball
- Adjust with flour or water if it’s off
After baking, use oven mitts to take out the bread pan. Gently turn your fresh white bread onto a wire rack to cool. Wait until it’s completely cool before slicing.
Bread Machine Settings and Timing
Making bread machine white bread needs you to know your appliance’s settings and timing. It usually takes about 3 hours. But, each machine might have its own cycle.
Your machine’s instructions will show a standard white bread cycle. It has several key phases:
- Mixing: 10-15 minutes of mixing ingredients
- Kneading: 20-30 minutes of dough development
- First Rise: 60-90 minutes for dough expansion
- Punching Down: 5-10 minutes to release air
- Final Rise: 30-45 minutes before baking
- Baking: 45-60 minutes at consistent temperature
Most machines let you adjust loaf size and crust color. You can pick light, medium, or dark crust. Choose what you like best and what your machine can do.
Pro tip: Use the delay start feature for perfect timing. It lets you set when you want your bread to start baking. This way, you get fresh, warm bread just when you need it.
Keep in mind, different machines have different cycle lengths. Always check your machine’s manual for the best results.
Tips for Achieving Perfect Texture and Crust
Making the perfect homemade white bread recipe needs focus and knowledge of baking basics. The texture and crust of your bread can greatly affect your baking experience.
Understanding Dough Consistency
An easy white bread recipe begins with the right dough consistency. Your dough should be smooth and slightly tacky, not too dry or too wet. Here are some key signs:
- Dough should pull away from machine sides cleanly
- Texture should feel elastic when touched
- No dry crumbly patches or excess stickiness
Temperature and Environment Factors
The performance of your bread machine is affected by the environment. The best baking conditions are between 70-75°F with moderate humidity.
| Temperature Range | Bread Performance |
|---|---|
| Below 65°F | Slow yeast activation, dense bread |
| 75-80°F | Optimal rising conditions |
| Above 85°F | Risk of over-proofing |
Troubleshooting Common Issues
If your homemade white bread recipe doesn’t work out, try these fixes:
- For dense bread: Check yeast freshness and machine paddle function
- For collapsed loaves: Measure ingredients precisely
- For tough crust: Reduce baking time or lower machine temperature
Pro tip: Brush a light coat of melted butter on top of hot bread immediately after removing from the pan for a soft, golden crust.
Nutritional Information and Serving Size
When you make white bread in your bread machine, knowing its nutritional facts is key. A slice of homemade white bread is a good mix of nutrients. It can fit into many diets.
| Nutritional Component | Amount per Slice |
|---|---|
| Calories | 168 |
| Total Fat | 4g |
| Carbohydrates | 28g |
| Protein | 4g |
| Sodium | 292mg |
Your homemade white bread usually makes 12 slices. This amount gives you enough nutrients for the day.
- One slice has about 168 calories
- It’s a good mix of carbs and protein
- It has less sodium than many store-bought breads
Homemade bread lets you control what goes into it. You can change the recipe to lower sodium or add more fiber by using different flours.
Tip: Always slice bread evenly to maintain consistent nutritional portions.
Storage Tips and Shelf Life
Keeping your bread machine white bread fresh is important. It needs careful cooling, storing, and handling. This way, your homemade white bread stays tasty and soft.
Proper Cooling Methods
Let your bread cool completely on a wire rack for 1-2 hours before slicing. This step is key to avoid moisture buildup. It helps keep the bread’s texture just right.
- Remove bread from machine immediately after baking
- Place on a wire cooling rack
- Wait 1-2 hours before cutting
Freezing and Thawing Instructions
You can freeze your bread machine white bread for later. Wrap it tightly in plastic wrap or foil. This keeps it moist and flavorful.
- Cool bread completely
- Wrap in plastic wrap or foil
- Place in freezer bag
- Store up to 3 months
To thaw, let it sit at room temperature. Pro tip: Warm day-old bread in the oven to make it taste fresh again.
Storage Best Practices
Store your homemade white bread in a bread box or paper bag. It usually stays fresh for 3-4 days. Check for staleness or mold. Always keep it in a cool, dry spot.
Recipe Variations and Modifications
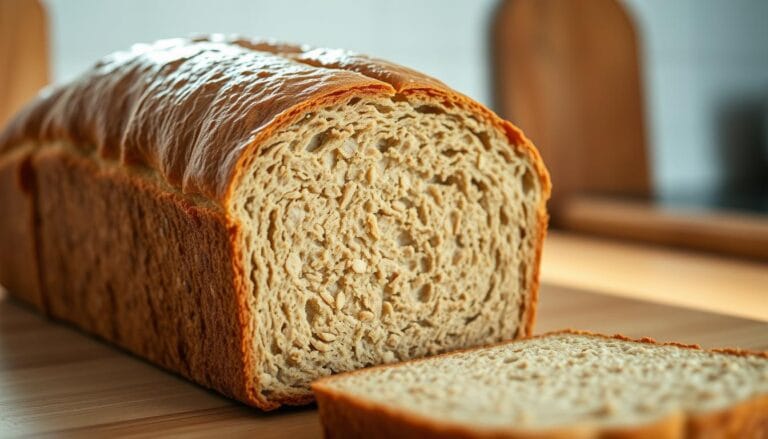
Changing your basic white bread recipe can lead to many tasty options. You might want to try a whole wheat bread machine recipe or a softer sandwich bread machine recipe. Just a few tweaks can make a big difference in taste and texture.
Trying different flours can really change your bread-making game. Here are some fun options:
- Replace some or all white flour with whole wheat flour for more nutrition
- Try using spelt or rye instead of regular flour
- Go for organic non-GMO flours for better flavor
For a softer sandwich bread, try these tips:
- Add more milk for a softer texture
- Use more butter for a richer taste
- Use honey instead of sugar for a natural sweetness
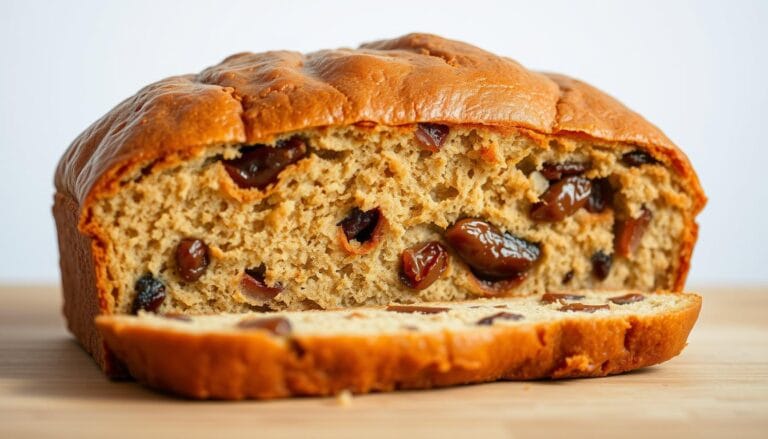
Your bread machine is super flexible. You can add:
- Nuts for a crunchy bite
- Dried fruits for sweetness
- Seeds for extra nutrition
- Herbs for a savory flavor
Don’t forget to adjust the liquid when you change ingredients. Start with small changes and see how they affect your whole wheat bread machine recipe. The goal is to find your ideal loaf through experimentation!
Conclusion
Making the perfect white bread in a bread machine is easy. This simple recipe lets you make delicious homemade bread with little effort. Your bread machine turns basic ingredients into a warm, fragrant loaf, just like from a bakery.
Every time you bake, you’ll get better at making bread. You can try different things by changing the ingredients. This recipe is great for both newbies and seasoned bakers, offering consistent, tasty results.
Baking fresh bread at home is a joy. It’s cheaper, you control what goes in, and you feel proud of your work. Start baking today and make this recipe your own. Share your stories, try new things, and enjoy making homemade bread.
Remember, amazing bread is just a few steps away. Your bread machine is ready for you. It’s time to make something special in your kitchen.