Delicious Dirt Cake with Oreo Crumbs
Table of Contents
In the Midwest, summer gatherings were special. They always included a beloved dessert. The dirt cake with Oreo crumbs was more than a treat; it was a cherished memory waiting to be made.
This no-bake dessert turns simple ingredients into a playful, creamy masterpiece. It captures the essence of childhood fun. Imagine a dessert that looks like a miniature garden landscape.
The dirt cake oreos create a delightful illusion. They make it look like rich, chocolatey “soil” covers a luscious cream filling. Each spoonful offers a mix of textures, from smooth pudding to crunchy cookie crumbs.
Whether it’s a backyard barbecue, a kids’ party, or a nostalgic craving, this dessert is perfect. It’s not just a recipe; it’s a culinary experience that brings people together.
Key Takeaways
- Dirt cake is a classic Midwestern no-bake dessert
- Perfect for summer gatherings and family events
- Easy to prepare with minimal cooking skills
- Visually appealing and fun for all ages
- Can be customized with different toppings and variations
Introduction to Classic Midwestern Dirt Cake

Dirt cake is a favorite dessert in the Midwest. It combines childhood memories with creative design. This makes it perfect for any celebration.
Origins of Dirt Cake
Dirt cake started in the 1970s in Midwestern homes. Home cooks mixed layers to create a dessert that looked like soil. They used crushed oreos as the main “dirt” ingredient.
Why This Dessert Became a Family Favorite
Dirt cake became a hit for good reasons:
- It uses simple ingredients like cream cheese frosting and crushed oreos.
- It’s easy to make for big groups.
- It’s loved by kids and adults alike.
- Its fun presentation grabs everyone’s attention.
Perfect Occasions for Serving
This dessert is great for many events:
- Summer backyard barbecues
- Children’s birthday parties
- Holiday celebrations like Easter and Halloween
- Potluck gatherings
Dirt cake is not just tasty. It’s also a fun and whimsical treat that everyone enjoys.
Essential Ingredients for Dirt Cake Oreos
To make the perfect dirt cake, you need the right mix of ingredients. Chocolate pudding is the creamy base. Oreo cookies become the “dirt” layer that makes it special.
Here are the key ingredients for your dirt cake:
- 1 package of Oreo cookies (crushed)
- 8 oz cream cheese (softened)
- 1/4 cup butter
- 1 cup powdered sugar
- Instant chocolate pudding mix
- 2 cups cold milk
- 12 oz whipped topping
- Gummy worms for decoration
Quality is important when picking your ingredients. Use full-fat cream cheese for a richer taste. Choose name-brand Oreo cookies for the best flavor. Instant chocolate pudding makes it easy to prepare, and whole milk adds a richer taste.
Pro tip: Keep your gummy worms chilled before adding them. This keeps them looking good and adds to the garden theme. You can make them look like they’re peeking out from the pudding.
Remember, you can adjust the ingredients to fit your needs. Dirt cake is all about being creative and adding your own touches.
Kitchen Tools and Equipment Needed
Making a simple dirt cake recipe needs some specific tools. These tools make the process smooth and fun. You’ll get a perfect edible soil dessert with the right equipment.
You don’t need to be a pro chef to make this dessert. Just a few basic tools are needed. They turn simple ingredients into a treat everyone loves.
Must-Have Utensils for Dirt Cake Preparation
- Large mixing bowl for combining ingredients
- Food processor or rolling pin for crushing Oreo cookies
- Rubber spatula for smooth mixing
- Measuring cups and spoons
- Electric mixer or whisk
Optional Decorating Tools to Enhance Your Dessert
- Piping bags for creative filling techniques
- Decorative spoons or small gardening tools
- Plastic flower pots or sand buckets for unique serving presentations
- Chocolate decorative elements
Storage Containers for Preserving Your Dirt Cake
Choosing the right storage container keeps your dessert fresh. Here are some good options:
- Clear trifle bowl with lid
- Airtight plastic containers
- Glass dishes with secure covers
With these tools, you’re set to make a wonderful edible soil dessert. It will look as good as it tastes!
Step-by-Step Preparation Guide
Making a tasty dirt cake with Oreos is simple. This no-bake treat needs little cooking skill but packs a big flavor punch. Let’s simplify the prep into easy steps.
To kick off your dirt cake journey, collect all your ingredients and tools. The key to a great dirt cake is being precise and patient.
- Crush the Oreo cookies into fine crumbs using a food processor or rolling pin
- Prepare the pudding mixture according to package instructions
- Blend cream cheese until smooth and creamy
- Fold whipped topping into the cream cheese mixture
As you layer the ingredients, your no-bake dessert will start to come together. The trick is to make clear layers that highlight the chocolate Oreo crumbs and creamy filling.
| Preparation Stage | Estimated Time | Difficulty Level |
|---|---|---|
| Crushing Oreos | 5 minutes | Easy |
| Mixing Cream Cheese | 10 minutes | Medium |
| Layering Dessert | 15 minutes | Easy |
Pro tip: For the best dirt cake, use original Oreo cookies. Make sure each layer is spread evenly. Your guests will love the texture and rich chocolate taste of this classic no-bake treat.
Creating the Perfect Creamy Filling
The heart of any delicious dirt cake is its creamy filling. Your dessert’s success depends on making a smooth, decadent mixture. This mixture should combine rich flavors and silky textures. Get ready to turn simple ingredients into a spectacular chocolate pudding-based filling that will make your dirt cake irresistible.
Mixing the Pudding Base
Start by preparing your chocolate pudding with precision. Whisk the instant pudding mix thoroughly to prevent any lumps from forming. The key is to blend the powder completely with cold milk, creating a smooth base for your cream cheese frosting.
- Use cold milk for best results
- Whisk continuously for 2 minutes
- Let pudding set for 5 minutes before next steps
Incorporating Cream Cheese
The cream cheese adds a rich, tangy dimension to your filling. Soften the cream cheese at room temperature to ensure it blends seamlessly. Beat the cream cheese until it’s completely smooth before gradually incorporating it into the chocolate pudding.
Adding the Whipped Topping
The final touch is folding in whipped topping, which gives your dirt cake filling an airy, light texture. Gently fold the whipped cream to maintain the fluffy consistency. Your goal is a creamy mixture that’s both decadent and light.
- Use gentle folding technique
- Avoid overmixing
- Aim for a smooth, consistent texture
Pro tip: Chill the filling for 30 minutes before assembling your dirt cake to help it set perfectly and enhance the flavors.
Making the Chocolate Cookie “Dirt” Layer
Making the perfect crushed oreo crust is an art. It turns your dirt cake into a delightful dessert. The edible soil layer adds texture and rich chocolate flavor to every bite.
To make the ultimate chocolate cookie “dirt” layer, follow a few steps. Start by picking high-quality Oreo cookies. The classic chocolate sandwich cookies are best for an authentic edible soil texture.
- Choose original Oreo cookies for the most authentic flavor
- Remove cream filling for a more authentic “dirt” appearance
- Use a food processor for consistent crumb size
Crushing techniques vary, but aim for fine, sandy-like crumbs. This mimics real soil. You have three main methods for crushing your Oreos:
- Food Processor Method: Quick and consistent crumbs
- Rolling Pin Technique: Manual crushing in a sealed bag
- Hand Crumbling: For a more rustic texture
The secret to a perfect crushed oreo crust is the right moisture balance. Melted butter binds the cookie crumbs together. This creates a cohesive layer that holds its shape while staying crumbly.
| Crushing Method | Texture Result | Effort Level |
|---|---|---|
| Food Processor | Fine, uniform crumbs | Low |
| Rolling Pin | Slightly varied texture | Medium |
| Hand Crumbling | Rustic, chunky crumbs | High |
Pro tip: For a realistic edible soil look, aim for crumbs that are small but not powdery. You want a layer that looks like dirt but tastes like chocolate.
Creative Presentation Ideas
Turn your dirt cake into a stunning dessert that will impress your guests. The right presentation can make this classic dessert stand out. It becomes a memorable centerpiece for any event.
Dirt cake is perfect for creative serving and decoration. It’s great for kids’ parties or summer gatherings. The presentation really makes a difference.
Trifle Bowl Assembly
A clear glass trifle bowl is ideal for showing off your dirt cake layers. Layering:
- Crumbled Oreo “dirt”
- Creamy pudding mixture
- Whipped cream
Individual Serving Options
For a personal touch, serve your dirt cake in unique containers:
- Mason jars
- Disposable plastic cups
- Small flower pots
- Vintage teacups
Decorative Elements
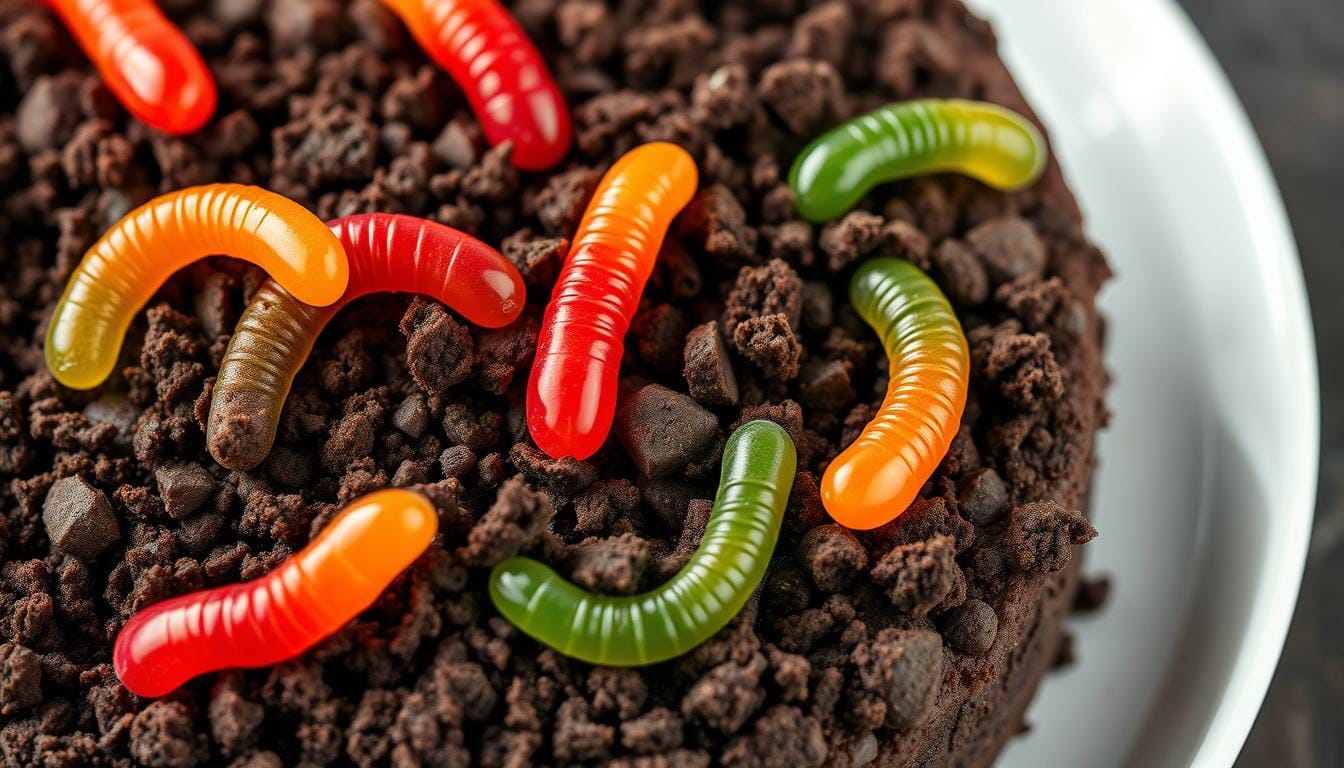
Add fun decorations to your dirt cake. Gummy worms are a hit with both kids and adults. You can scatter them or create a “worms emerging” effect.
| Decoration Type | Recommended Placement | Visual Impact |
|---|---|---|
| Gummy Worms | Between layers | Playful and Fun |
| Edible Flowers | Top surface | Elegant and Sophisticated |
| Chocolate Shavings | Garnish | Rich and Decadent |
Your dirt cake is a canvas for creativity. Try different serving styles and decorations. Make this summer treat uniquely yours.
Storage Tips and Make-Ahead Instructions
Making this easy no-bake dessert recipe ahead of time is a great idea. It makes planning for parties much easier. The best part is, you can make it early and let the flavors mix in the fridge.
For the best taste, follow these storage tips:
- Store your dirt cake in an airtight container
- Keep refrigerated at 40°F or below
- Consume within 3-5 days of preparation
You can make your no-bake dessert up to two days before. This way, you save time and enhance the rich, creamy flavors. The cookie crumbs will get softer, making the dessert even more indulgent.
Pro tip: Prepare the dirt cake the night before for a party. This lets the ingredients chill and blend. It makes the dessert more cohesive and tasty, impressing your guests.
Storing individual portions? Use mason jars or clear plastic containers with tight lids. They keep your dessert fresh and look great, showing off the layers of your dirt cake.
Dietary Modifications and Substitutions
Making a dirt cake for different diets is simpler than you think. It’s great for those with food allergies or following specific diets. These tips will let you enjoy this beloved dessert with your friends.
For those who can’t have gluten, finding the right cookies is key. Gluten-free cookies can make your dessert just as tasty. Look for gluten-free chocolate sandwich cookies for a similar texture.
- Vegan cream cheese frosting options
- Gluten-free cookie substitutions
- Dairy-free whipped topping alternatives
- Low-sugar sweetener replacements
Changing the dairy in your dirt cake is easy. Use plant-based cream cheese made from cashews or coconut instead of regular cream cheese. These options are creamy and fit dietary needs.
| Dietary Restriction | Recommended Substitution |
|---|---|
| Gluten Intolerance | Gluten-free chocolate sandwich cookies |
| Dairy Allergy | Coconut-based cream cheese |
| Vegan Diet | Plant-based whipped topping |
For those watching their sugar intake, try using stevia or monk fruit. These sweeteners keep the dessert sweet without too much sugar. They help you stick to your diet goals.
Trying new ingredients might need some tweaking to get it just right. Don’t worry if it takes a few tries to find the perfect mix. Keep experimenting until you create a dirt cake that’s just right for you.
Seasonal Variations and Theme Ideas
Turn your classic dirt cake into a fun summer treat for any party. This dessert is perfect for any theme or season.
For a beachy summer party, make an ocean-themed dirt cake. Use blue-tinted whipped cream for ocean waves. Add gummy worms as sea creatures in the “sand” made of crushed Oreo cookies.
- Halloween Graveyard Cake: Add chocolate tombstone cookies and plastic skeletons
- Easter Garden Cake: Decorate with pastel-colored candy flowers and chocolate eggs
- Christmas Winter Wonderland: Use white chocolate shavings for snow and mint-colored decorations
Be creative with your toppings and mix-ins. Use seasonal candies, themed sprinkles, and colorful garnishes. This will make your dirt cake a standout dessert for any celebration.
Pro tip: Think about the color palette and decorations for your themed dirt cake. Gummy worms add fun and texture to your summer treat.
Conclusion
Your dirt cake oreos adventure is more than just a dessert. It’s a culinary experience that turns simple ingredients into a memorable treat. This no-bake dessert brings families together, creating moments of joy and laughter.
With its rich layers of creamy filling and chocolate cookie crumbs, dirt cake shows that delicious doesn’t have to be complicated. It’s perfect for any occasion, whether it’s a children’s party, family gathering, or a weekend treat.
The ease of preparation makes it a standout recipe in your dessert collection. You can whip up this crowd-pleaser in minutes, making it ideal for spontaneous sweet cravings or planned celebrations.
Embrace the creativity that comes with making dirt cake. You can always make this dessert your own. Try different Oreo flavors, add seasonal decorations, or create individual servings that surprise and delight. Your dirt cake journey is limited only by your imagination.
So grab your ingredients, channel your inner pastry chef, and get ready to create a dessert that will have everyone asking for seconds. Your dirt cake adventure starts now!